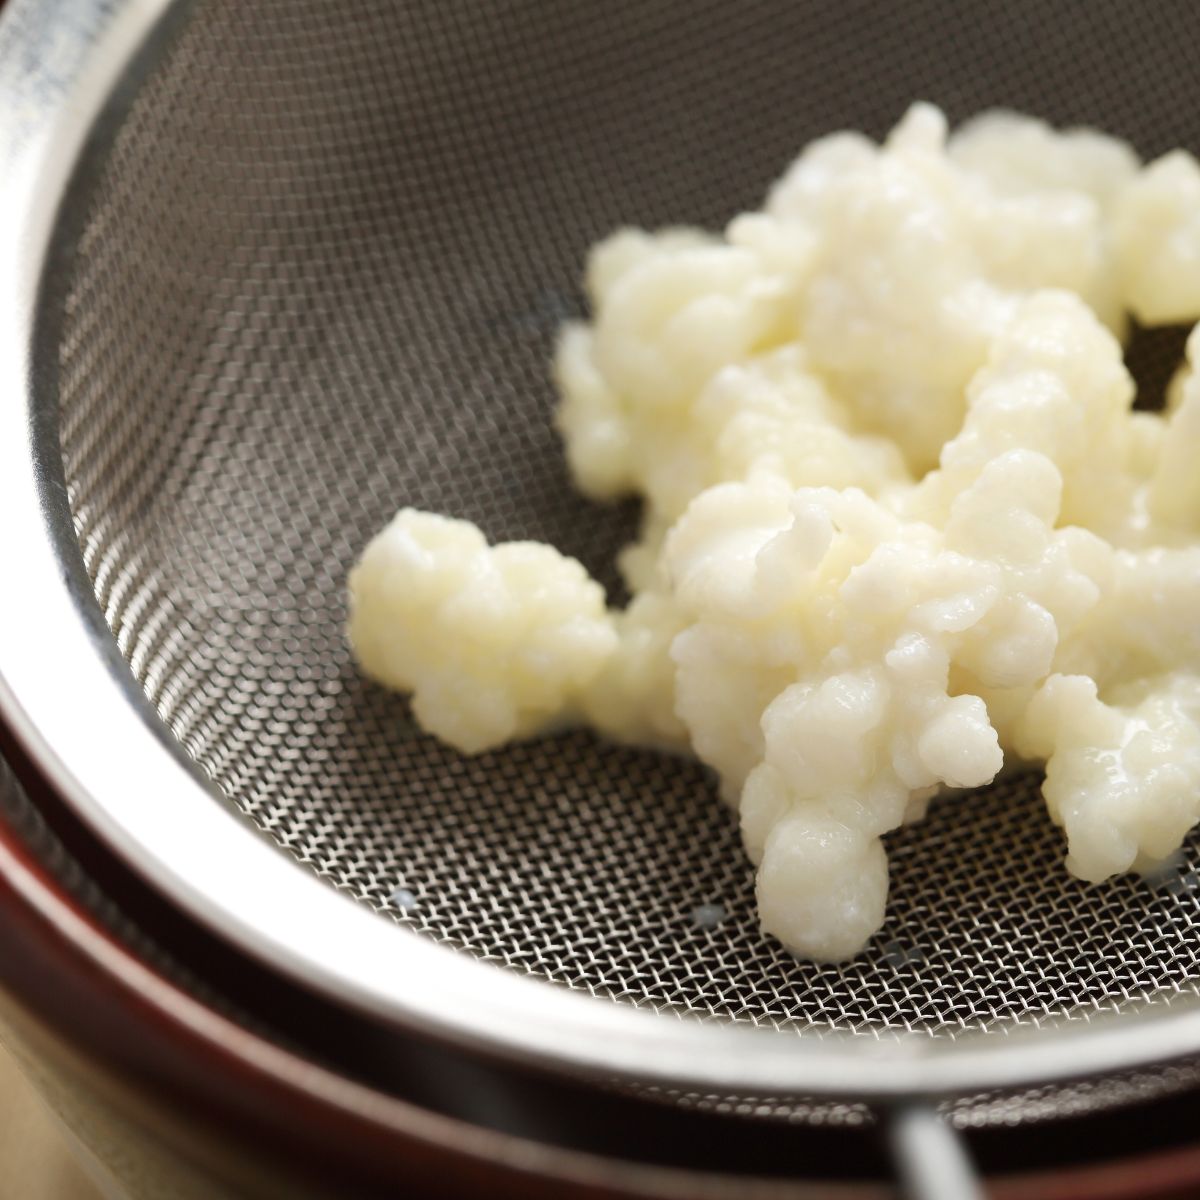
How To Freeze Milk Kefir Grains
Freeze kefir grains for up to six months when you want to take a break from making homemade milk kefir. Here’s how.

We recently started a dairy free diet for our toddler in hopes to relieve some inflammation issues he’s been having.
Unfortunately that means less trips out to the dairy farm where we buy our raw milk from. The rest of us don’t drink much milk at all.
So for a little while at least, I will be taking a break from making milk kefir.
Although I recently learned from culturedfoodlife.com you can make different kefir milks dairy free by using coconut milk or other nut milks. I might have to try that in the future! But in the meantime here’s how I plan to prepare the kefir grains for long term storage.
How Do You Store Kefir Grains Long Term?
There’s a few ways to store kefir grains when you need to take a break.
If you only need to take a two-four week break then the easiest thing to do is just place the kefir grains in a glass container.
You can use a mason jar or an empty pasta sauce jar, just make sure its glass and not plastic.
Add two – four cups of fresh milk to the jar and close the lid tight. By adding the milk you are making sure the grains will be well fed until the next time you’re ready to use them.
I personally like to use raw unpasteurized milk but that’s not necessary, you can use regular whole milk from the grocery store as well.
For longer breaks and more long term storage you can freeze milk kefir grains or dry them out completely.
How To Freeze Kefir Grains
- To freeze milk kefir grains you will first rinse them in fresh milk.
- Lay them on a clean cotton kitchen towel or unbleached paper towels in a safe place.
- Let them air dry at room temperature until completely dry. Don’t exceed five days.
- Once dry, place the kefir grains in a freezer safe air tight container. Preferably a glass jar, although you can also use a ziplock freezer bag if you need to.
- Add a little bit of organic dry milk powder until they are well coated to give them a layer of protection.
- Label them with the date and place them in the freezer.
- A good idea is to check on them after six months to make sure they don’t have freezer burn. If they look like there is no freezer burn you can increase the length of time in the freezer close to a full year.
How Do You Revive Frozen Kefir Grains?
When you are ready to start making kefir again, take the grains out of the freezer and place in the refrigerator for 24-48 hours.

Once defrosted strain them using a plastic strainer and rinse off the powder milk with a little bit of fresh milk.
After rinsing, place milk kefir grains in a glass jar with one cup of milk and cover with a cotton or cheese cloth for 24 hrs.
You might have to repeat the process a couple of times to fully awake the grains and get them started on the fermentation process.
Once the milk starts to thicken and the grains are floating on the surface of the kefir, you can begin making a new batch of kefir on a regular basis again.
How To Dry Kefir Grains For Long Term Storage
- Rinse kefir grains well with distilled water. Make sure not to use chlorinated water from the faucet as it will kill all the good bacteria.
- Lay them on a clean cotton kitchen towel or unbleached paper towel in a safe place.
- Let them air dry for a couple of days at room temperature.
- Once the grains are dry, place them in a clean glass jar with a small amount of dried milk powder and an air-tight lid.
- You can then store in the refrigerator for up to six months.
How Long Will Kefir Grains Last
The good news is that under the right conditions, kefir grains will last for a very long time. Pretty much indefinitely under proper care and preservation methods.
Kefir grains are a living organism just like a kombucha scoby and they replicate with every new batch of kefir you make.
How Do You Know If Kefir Grains Are Dead?
The best way to know if milk kefir grains are dead is to get to know them.
You will want to always keep an eye on them because that’s the only way you will notice different signs of bad health in the grains.
Signs of sickness:
- If the grains start to look discolored.
- Bad smell.
- If the grains don’t rise to the top of the jar after a few hours of being in fresh milk and they are just hanging out in the bottom of the jar.
- Or if you start to see mold, toss and start new again.
If you end up having to throw away the grains and you would like a new batch, hopefully you have a friend or family member that is willing to share some of theirs with you. If not you can always order a new kefir starter culture.
Benefits of Kefir Grains
If you’re reading this blog post chances are you already know all the wonderful benefits of drinking milk kefir.
But just in case you’re still pretty new to these little guys, here’s a quick list of health benefits:
Studies have found that the good bacteria in fermented foods like kefir, kombucha, sauerkraut, yogurt and kimchi support heart and digestive health.
Helps with constipation problems by balancing out the healthy bacteria in the gut.
Kefir is a good source of vitamin C, calcium,, vitamin K, folate, phosphorous, and magnesium.
{source}
Builds bone strength.
Contains probiotics that can boost your immune system.
Supports skin health.
The live microorganisms in milk kefir may help with allergy symptoms.
{source}
Possible Side Effects Kefir
If consumed in high amounts, it may cause bloating and stomach pains.
It’s best to drink no more than one cup a day.
If you’re just starting out with fermented foods in general, it might be better to introduce into your diet slowly.
Maybe try one cup, two or three times a week to give your stomach time to adjust to all that beneficial bacteria you’re introducing.


Final Thoughts
Alrighty friends! I hope you found some good tips for preserving those kefir grains for longer periods of time between uses.
Leave any questions you might still have down in the comments and don’t forget to share this post with a friend!


